 Good news in the post today.... A V5 for the CD90Z bearing the original registration number. In the end it was a pretty easy task thanks to the help of the guys from the East Anglian Cyclemotor Club. They inspected the CD90Z and checked over my application forms and sent them off. Once inspected the process was very quick - maybe I was lucky as you hear some bad stories regarding the DVLA but on this occasion they were very efficient. Not sure what photo to put with a tax form story so I thought I'd put an old photo of me with a CA160 I owned in a former life!
Wednesday, 23 February 2011
Re-registered CD90Z
Good news in the post today.... A V5 for the CD90Z bearing the original registration number. In the end it was a pretty easy task thanks to the help of the guys from the East Anglian Cyclemotor Club. They inspected the CD90Z and checked over my application forms and sent them off. Once inspected the process was very quick - maybe I was lucky as you hear some bad stories regarding the DVLA but on this occasion they were very efficient. Not sure what photo to put with a tax form story so I thought I'd put an old photo of me with a CA160 I owned in a former life!
Sunday, 23 January 2011
CD90Z - the renovation continues.

Just to prove I am still doing the odd bits on the bike here are the next seat repair photos. First one is after the electrolysis a going over with Kurust. I then painted it with some old rust preventing primer I found in the garage.

Then it was a coat of red from an aerosol a relic of an old Sherpa I once owned. At last I was ready for a bit of fibre glassing...

First face done and a check to see if it still fits ok. Which it does. It is already a lot more robust. I left the extra fibre glass sheet on the edges so I can turn it over to form the missing sides of the seat. As a matter of interest, the resin and hardener was given to me by my brother 10 years ago and it still worked perfectly - just in case you have some old stuff in the shed and are wondering if it is still any good!

With the second face done it is starting to look more like a seat base again. the next stage will be to form the missing sides of the seat which I will the cut to shape once I have put sufficient sheeting onto the base.

While I've been tackling the seat base in the garage, I've also been putting the cover together in the warm. From the pattern I made, (see below), I cut out the leather off an old settee. Some piping formed from white leathercloth means I now have a real battle to get the needle through. Anyway I have managed to tack it and am slowly hand stitching with closer stitches. I have more leather to add to the bottom edge of the cover. It is starting to look pretty good - hard to tell in the photo without the seat foam padding it out though. Probably time to order some paint to start on the frame and a set of bushes for the swing arm while I am at it.
Monday, 10 January 2011
CD90Z - more seat work
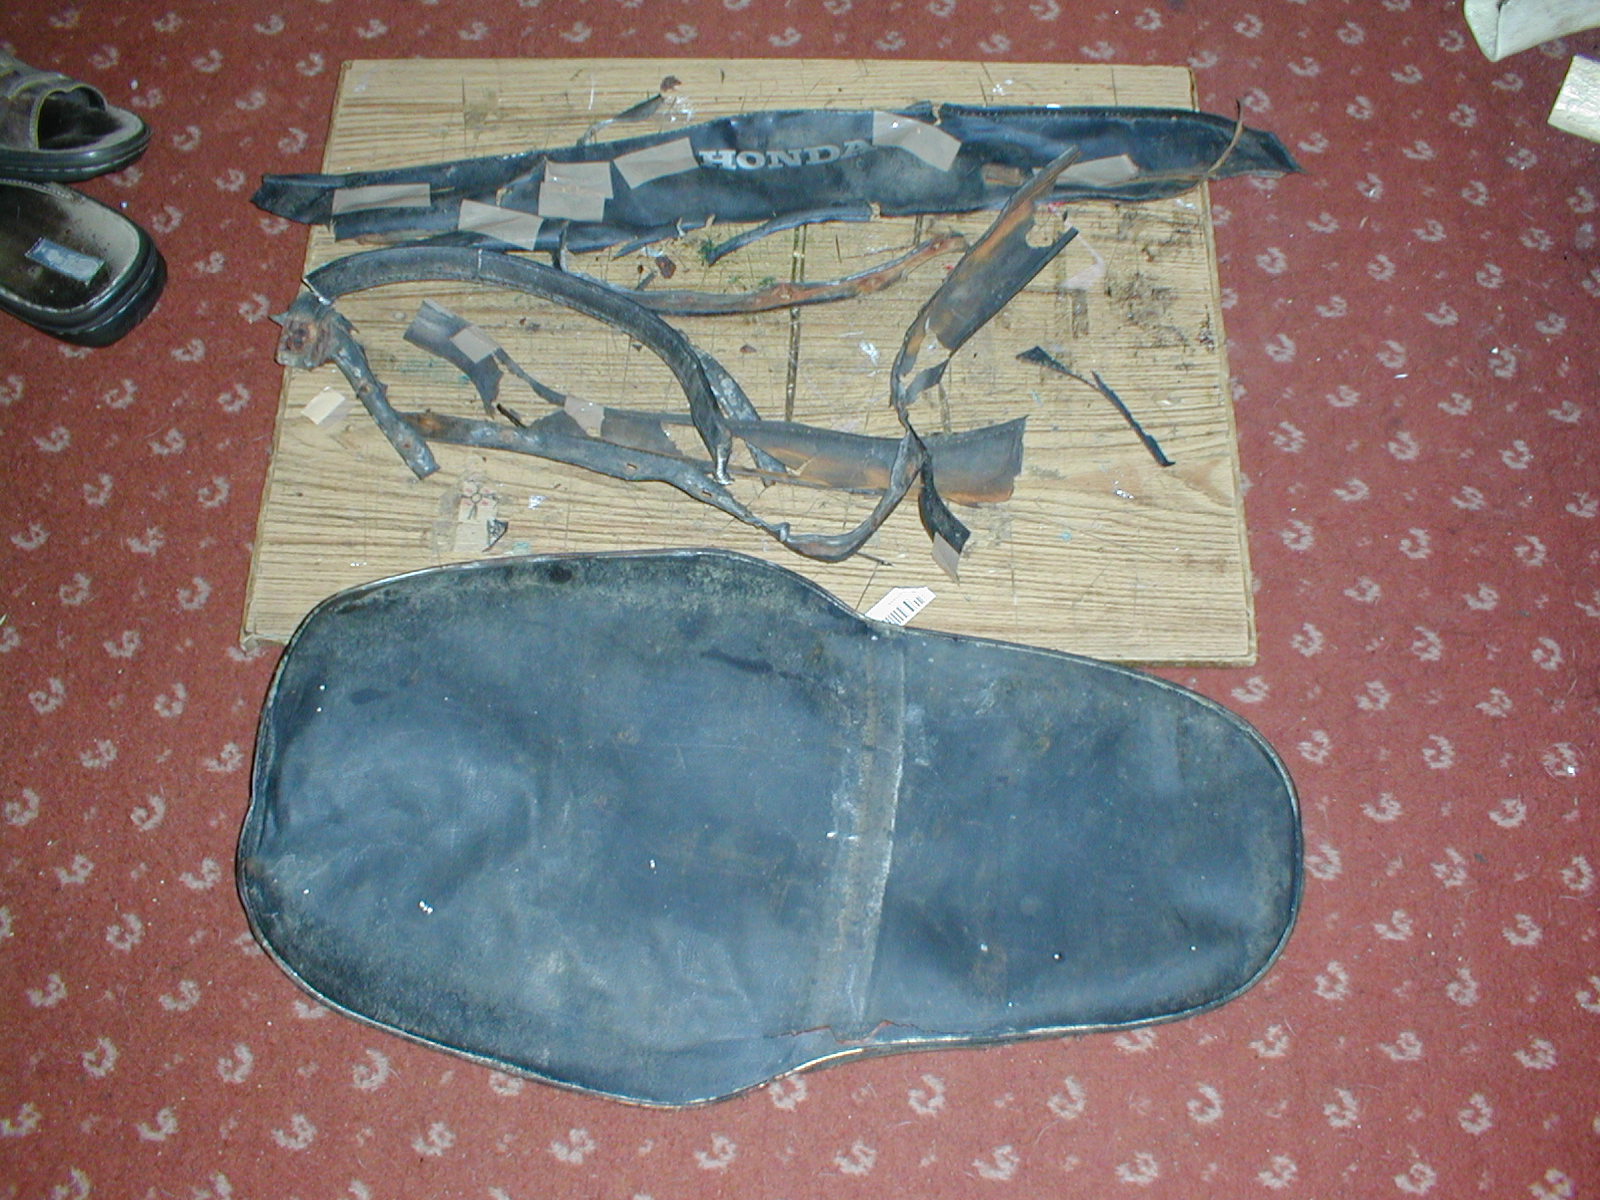
I thought it was about time I started work on the CD90Z after the Christmas festivities. The seat seemed a good place to begin. A quick tap and it fell apart. So I unpicked the cover, or what was left of it, the years and weather had made the vinyl very brittle.

A bit of sticky tape and some imaginative drawing round what was and wasn't there and I had a pattern. More sticky tape and I had something that actually resembled a seat cover. Result!

But what of the seat base. After dismantling it looked like this...
Not that much left of it, but as I intend to use an idea put forward on the c90club forum, to encase the rusty hulk in fibreglass that shouldn't be too much of an issue.
However I thought I may as well try out the electrolysis idea and see how well it works.

An old plastic dustbin, some washing soda, a 12 volt battery charger, a bit of steel sheet and some water and I was ready to go. A couple of tablespoons of soda in the water, connect the negative lead to the metal you want to clean, the positive to the scrap and switch on. The process gives off hydrogen gas so don't touch the two bits of metal or you may need a new shed/garage. Anyway it really seems to work rather well and the horribly rusty seat base is beginning to look a little better. Next bit will be to start making the cover, I have some nice burgundy leather off an old Chesterfield........
Saturday, 25 December 2010
Re-registering Honda CD90Z

I took the first steps in re-registering the CD90Z. A quick reassembly of the bike to show that it is more or less complete and is a CD90Z was undertaken - it now looks like the photo. I contacted the East Anglian Cyclemotor Club (link on the right) who have an interesting site, lots of info, and are authorised by the DVLA to verify form V765 for smaller bikes. The EACC have provided some very useful advice which included getting a photocopy of my original logbook certified by my local DVLA office so I can retain the original and send off the photocopy for verification of the V765 - saves losing my green logbook. As a matter of interest the local DVLA office didn't charge for providing a certified copy of the logbook, I just popped in and they did it while I waited. The EACC charge £10 for the verification, plus an additional amount for expenses for an inspection of the bike which hopefully won't be too much as they have a member who is local to me. More on how this process pans out as I go through it.
Monday, 13 December 2010
Another old photo CD90Z

And here's a photo of the CD90Z back in the 70s, the identity of my brother has been disguised to protect him - he needs it with that hair!
It was a sparkly bike back then.
Sunday, 12 December 2010
CD90Z renovation aspiration!

Well this would be nice, not perfect but a lot better than the rusty bike I have now! My brother kindly provided this earlier pic - not from when he first owned the bike but a few years after, when it was no longer ridden but sitting quietly outside (horror of horrors). It appears to have been in pretty good condition still. This photo has the reg number clearly visible which will hopefully help when it comes to getting the bike re-registered with DVLA. I am hoping to find a photo off an early 35mm slide that shows the bike in its heyday, which should be even better for the inspiration to press on with the rebuild.
My latest job has been to chop the spokes off the front wheel to prepare the hub for re-spoking. Offsets measured and photos taken of course!
I am considering which paint system to use, I quite fancy the KBS paint system http://www.therustshop.com/shop/ which looks like it could possibly be better than POR-15 over bare metal. Anyone got any experience of it? I'm intending brush painting to get a good coverage and it looks like you can still get a really smooth, tough finish.
Tuesday, 30 November 2010
The Good, The Bad and the downright Ugly
The Good
Well here's a couple of photos of bits I've started work on, the headlamp/speedo case which is now looking pretty good in primer, the handlebar clamps and left & right switches (main/dip and indicators). The switches were fun, seized and a bit rusty with the screws to unmount the internal components also not yielding to a screwdriver. Liberal amounts of WD40, patience and a new ball bearing means they now function perfectly again.


The Bad
And here's a couple of wheels to rebuild, they are rather rusty but the hubs look fine and polish up well. If anyone out there knows if standard C90 wheels would fit, please let me know.


and The Ugly
mmm this one looks more difficult, I don't think a bit of sticky plastic and a washing up bottle will fix it. Watch out for later blogs in which I may figure something out! It is the seat off my CD90Z in case you're not sure!


Sunday, 28 November 2010
CD90Z fuel tank woes.

 Ok, what's the picture on the left of, a colander a tea strainer? No it's a CD90Z petrol tank. Perforated across the top and as rusty as a rusty thing inside. Probably scrap really but seem to be pretty rare and difficult to find a replacement so it may have to be a repair. As I mentioned in an earlier blog I'm thinking of having a go at electrolysis to remove the rust - (not only an unwanted hair removal method). If successful I'm hoping it will still be in a condition to repair with a POR-15 Fuel Tank Repair Kit. There seem to be three stages to this kit. First a chemical to remove fuel gum, sludge and varnish and then another to treat the rust. Finally a tank sealer which makes what appears to be a tank within the tank. Well fine in theory but how well it works I hope to find out later. This should hopefully make the interior of the tank impervious to fuel and oxygen. Before I start fixing the inside I'll need to fill the holes from the outside and try the electrolysis. See how these experiments work in a later blog.
Thursday, 25 November 2010
Dismantling, stripping and sanding

 Dismantling the bike was next. This went fairly easily with liberal amounts of WD40 and the occasional use of a blowtorch. I was reacquainted with problems my brother had had over 30 years ago; the bar through the stand was totally seized and needed heat and a visit from my mallet to persuade it to release itself from the position it had occupied for the last ... years. I can remember my brother fighting with it. I also noticed that the clutch cable anchor point on the engine casting was broken and was clinging on with the aid of a jubilee clip - another bit that took me back as I can remember this being a short term measure to keep the bike on the road - 30 years ago! I have now stripped the frame, swinging arm, fuel tank and fork shrouds. I have repaired the headlight with fibre glass and undercoated it. I managed to find a new 6v battery at a car boot sale for a fiver which will hopefully give me sufficient power once it is filled with acid. I stripped the paint with regular paint stripper and an abrasive wheel from Halfords.
So what's the damage?

Time has taken its toll on the CD90Z. The petrol tank is rusted quite badly inside, with the odd perforated holes coming though on the outside (I will probably be having a go at using electrolysis to reduce the rust problem - more in a later blog). The chrome panels have also rusted through the chrome. The seat is totally gone, cover useless and base very badly rusted - cough too much and bits just fall off. On the rear suspension units the chrome has rusted. The wheels are in poor condition; spokes and rims are badly rusted and the tyres after years of standing are split and useless. The mudguards are rusted but should be recoverable - a bit of welding will be needed on the rear guard. The handlebars have some rust but should clean up reasonably well but the indicator and headlight handlebar controls are rusted solid. Forks are reasonable condition but the chrome is rusted and a mudguard screw is sheared off. The chrome on all the indicators is pitted. The headlamp has a bit broken off and the rim is rusted. The keys are lost and the ignition switch rusted internally. Well that's for starters anyway, I may find more as I go along - why am I attempting this? The good news is that twisting the two ignition wires together with a 6 volt transformer supplying power produced a spark. I cleaned the carburettor jets, filled the float with clean fuel and kicked over the engine and it actually spluttered into life - noisy though as the exhaust is non existent as the rust bug has eaten the silencer.
The story begins - a very sad Honda CD90Z

This is a blog about a Honda CD90Z which my brother bought about 35 years ago. It used to be in great condition but after being sat outside a shed for the most of it's life the poor bike was rather sad and rusty. I was given the Honda about ten years ago and it has lain around for about 10 years in my garage, which at least kept the weather off it. So this is the story of what happens next, I will attempt to restore it as it is part of my youth - the only motorbike left of many that were around in my teens! As you can see the CD90Z has some parts removed but you can see the poor condition in the photo - in real life it's worse! In my next blog I'll give details on the condition of the parts. In subsequent blogs I hope to say what worked and what didn't and tell of the good products and methods I may discover on rebuilding this bike.
Subscribe to:
Posts (Atom)